Playing DVDs on my Apple TV
I stream my music and store my pictures online. Home stereos moved from single CD to the multi-disc carousel but DVD players have remained oddly behind the times. There are a few DVD changers on the market but that's only a stop gap solution and it requires that you plan ahead for what you're going to watch. I was in search of a way to have every movie I own just a few clicks away. I've found a solution via Apple TV, my Mac and RipIt. I spent time searching online and there wasn't much out there so I hope this post answers at least one persons question before they buy an Apple TV. This is aimed at people who don't want to play with encoding options and just want things to work out of the box.
Disclaimers and Bullshit
Here is where I say that copying DVDs for your own personal use (format shifting) may be prohibited by law. It depends on where you live and what way the political wind is blowing. All of that aside I looked to iTunes for my justification. While Apple would love to sell me music I would never switch to iTunes if there was no way to import CDs I already own. I bought and Apple TV so I could both buy content and so I could import the content I already own.
One DVD, Start to Finish
The latest version of RipIt will copy entire DVDs to your hard drive and also compress them into smaller, Apple TV compatible formats. The conversion is done by Handbrake under the covers but RipIt does a great job of handling installing and configuring Handbrake, which is not a novice activity. You can feel free to forget all of that but it might be helpful to know.
Step 1: Rip the DVD
- Step 1: Put a DVD in the drive
- Step 2: Open RipIt (first image)
- Step 3: Click the "Rip it" button (second image)
- Step 3.a: wait 45-60 minutes, depending (third image)
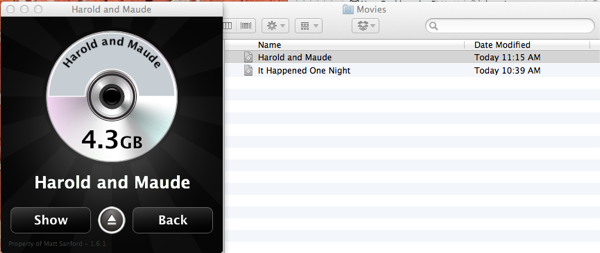
- Step 4: Eject the DVD (completed in image four)


Thats all. RipIt will place a .dvdmedia file in your Movies folder and helpfully open a window to it when it's done. You may notice that there
is a "Compress" button in RipIt. I do this in two steps instead for a few reasons. The main reason is for flow (described below) but the
other reason is that if a compression fails it's much faster to re-try from your computer rather than re-reading from the DVD.
Step 2: Compress the Movie
Assuming RipIt is still open you can drag the .dvdmedia file on to the RipIt window. By default RipIt will find the longest track on the DVD (usually
the feature) and compress it. I recommend taking a very short tour of the RipIt preferences (first image below) before your first DVD. The "Compress" tab at the top
has a few helpful options. "Import into iTunes" should be checked, and I recommend "Delete after importing into iTunes" to save on disk space. I set
the "Video target" to "High Quality M4V", which is a format compatible with the most possible gadgets. You can us "Apple TV 2" if you like but I opted
for something a little less specialized in exchange for slightly bigger files. So, the steps are:
- Step 1: Drag the
.dvdmediafile onto the RipIt window - Step 2: There is no step two. It already started doing the work. (it should look like the second image)
- Step 3: Wait a long time for it to finish.


Step 3: Annotating (optional)
While this step is purely optional it's a small amount of time you can invest for a much more professional outcome. When DVDs are imported into iTunes they don't have any information like year, actors, description or cover art. When you browse from your Apple TV that can make it hard to tell everything apart. There was a program named MetaX that I had been using to add information to my compressed movies but development has been discontinued since I first wrote this post. The best successor is MetaZ though I don't have any direct experience with that.
Step 4: Streaming the Movies
I stream all of my movies over wifi using iTunes Home Sharing. Apple has an article on how to set it up. It's pretty simple and once it's done your computer will show up on your Apple TV and will contain all of the movies you've imported.
Bonus: My Flow
It's silly that this takes three steps (rip, compress, annotate) and with any luck Apple will fold all of this into iTunes someday. Until then I
have a hundred DVDs to process and this is tedious. My flow is to stack 4-5 DVDs next to my computer and periodically throughout the day I eject one
and insert another and start it ripping. This is a minor inconvenience and given the speed I can usually get through the stack with no problem. By
the time my son is in bed and I have more time to unwind I usually start compressing. I drag a .dvdmedia file onto RipIt and ignore the computer. It
usually takes a few days before I finish all 4-5 I have in the Movies folder but there is no hurry. When everything is done I do one pass with MetaX
(usually about 20 minutes of work) and start it all over again.